Race Car Setup Geometry: Toe, Camber, Caster, Ride Height and Rake
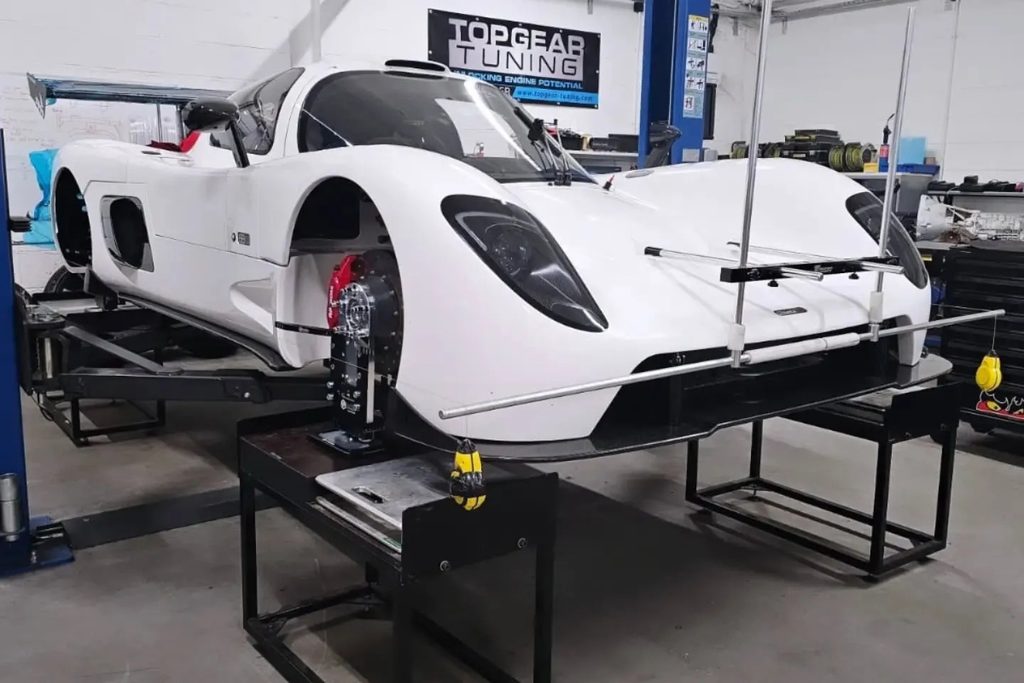
Suspension geometry is the part of race car setup that determines how each tyre interacts with the track. Toe trades turn-in response against stability, camber keeps the contact patch working under cornering load, caster shapes steering feel and dynamic camber, and ride height and rake set the platform, roll centres and aero balance. None of these work in isolation, so the right numbers come from a measured baseline on your own car, changed one at a time and tested to suit your driving style and the conditions, not from someone else’s setup sheet.
What Does Geometry Control in Race Car Setup?
Geometry controls the angle and position of each tyre relative to the track, both at rest and as the suspension moves. Springs and anti-roll bars decide how much the car moves; geometry decides what the tyre does when it does move. If a tyre is running on its shoulder mid-corner, no amount of damper adjustment will recover the grip.
Before comparing any figures, agree the conventions. Toe can be quoted as a total across the axle or per side, in degrees, minutes or millimetres, and a millimetre figure only means something if you know the diameter it was measured across. Negative camber means the top of the wheel leans in towards the chassis. A setup sheet that doesn’t state its conventions tells you very little. Here at MacG Racing, we always measure toe in millimetres per side.
Toe: Turn-In Response Versus Stability
Toe is the angle of each wheel relative to the car’s centreline, seen from above. Toe-in points the front of the wheels towards each other and toe-out points them apart. Any toe adds some tyre scrub, drag and heat, so it’s a trade rather than free grip.

Front Toe
A little front toe-out makes the car keener to turn in, but it can wander on the straights and feel nervous under braking over bumps. Front toe-in calms the steering at the cost of a lazier initial response. Many circuit cars start close to zero at the front and adjust in small steps from there, based on what the driver reports at turn-in.
There are other considerations too. On a rear-wheel-drive car, for example, adding front toe is a useful way to generate more tyre temperature. Too much toe adds drag, though. That may not matter much in a powerful GT car, but on a low-power car such as a Formula Ford it can have a significant effect on top speed.
Rear Toe
Rear toe-in adds stability on corner entry and under power. Rear toe-out is rarely wanted on a circuit car, because it makes the rear unsettled and quick to step out. Worn or soft bushes can let rear toe change under load (known as compliance), so a setting that looks right on the setup pads may not hold on track. Adjustable arms with harder bushes or solid bearings, such as those in our chassis and suspension arms range, let you set rear toe precisely and keep it there.
Camber: Keeping the Contact Patch Working Under Load
Camber is the inward or outward tilt of the wheel seen from the front. Negative static camber compensates for body roll and sidewall deflection, so the loaded outside tyre runs flatter mid-corner, which is where the grip is needed most. The cost is a smaller effective contact patch in a straight line, which affects braking and traction, plus extra heat and wear on the inner shoulder if it’s overdone.

Static Camber Versus Dynamic Camber
The number on the alignment printout is static camber. What matters is the camber of the loaded outside wheel at the apex, and that depends on roll, the suspension’s camber gain and caster. Double wishbone layouts typically gain negative camber in bump, while a MacPherson strut gains little and loses camber relative to the road as the body rolls. That’s why strut-equipped cars often need more static camber to achieve the same dynamic result.
Tyre temperatures taken across the tread (inside, middle, outside) straight after a run are the most practical check on whether camber is working. A static figure is a starting point; the tyres show what’s happening on track.
Caster: Steering Feel, Self-Centring and Camber Gain
Caster is the fore-aft tilt of the steering axis seen from the side. More positive caster increases self-centring and steering weight, both of which shape the feedback the driver gets, and as lock is applied it adds negative camber to the outside front wheel and positive camber to the inside one. That makes additional caster a useful source of dynamic camber in slower, tighter corners, where steering angles are large.
The trade-off is heavier steering and, on some cars, a change in wheelbase, ride height and toe when caster is adjusted. For that reason caster is set before camber and toe, never after. The extra steering weight from larger amounts of caster can be a problem in cars without power-assisted steering, but is generally not an issue with power steering. Very high amounts of caster can also cause jacking effects, which can upset the balance of a car.
Ride Height and Rake: Platform, Roll Centres and Aero Balance
Ride height sets the centre of gravity, the suspension travel available and where the roll centres sit. Lower is not automatically better. On many road-derived cars, especially those on MacPherson struts, lowering drops the roll centre faster than the centre of gravity, which increases the roll moment. It can also push the lower arms past horizontal so camber gain reduces significantly, and it brings the bump stops into play earlier.
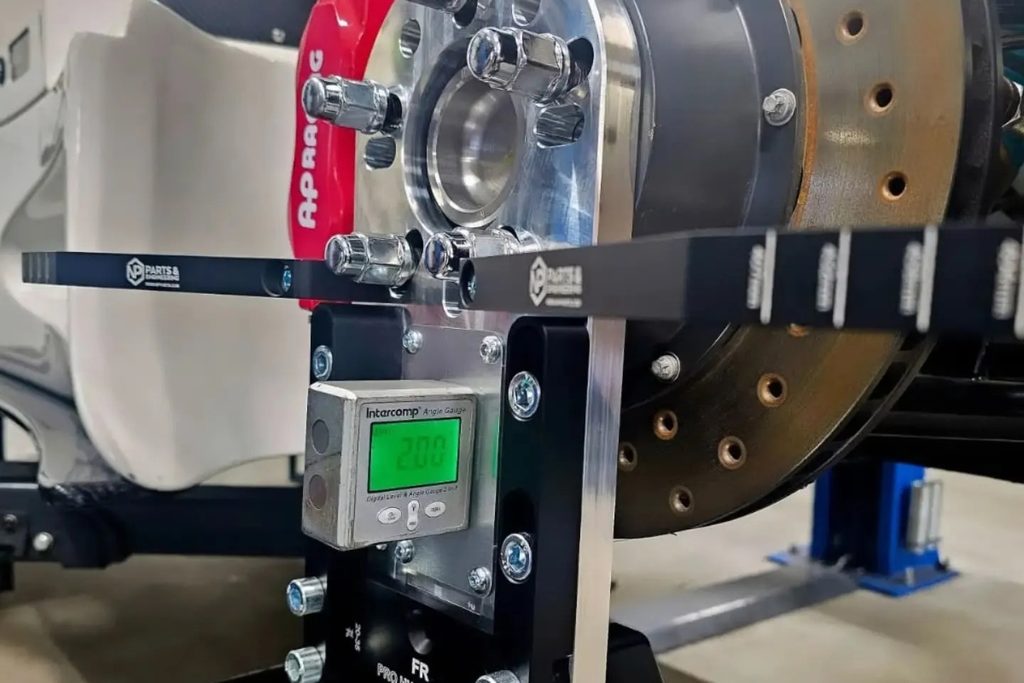
Rake is the difference between front and rear ride height. On a car with a working splitter, floor or diffuser, more rake usually moves the aero balance forward. Rake also changes the effective caster angle, so a significant rake change means rechecking the front end. Always measure ride heights from fixed chassis points rather than arches or bodywork, and check your championship’s technical regulations, published through Motorsport UK, for any minimum ride height or ground clearance rules.
Why Can’t You Copy Another Car’s Geometry Settings?
Geometry settings are a product of everything else on the car, so they rarely transfer, even between two examples of the same model. The main reasons are:
- Tyres: construction and compound change how much camber a tyre wants and how it responds to toe.
- Springs and anti-roll bars: different rates mean different roll angles, so different dynamic camber from the same static figure. Stiffer springs and roll bars also affect load transfer, which directly affects the load on each tyre during cornering.
- Weight and distribution: a lighter car, a different fuel load or a different driver all change the loads each tyre sees.
- Kinematics: a change of coilover, arm or upright can alter camber gain and roll centre height.
- Measurement method: the same car measured with different equipment or conventions can produce different numbers.
- Circuit, conditions and driver: a setup that suits a fast, flowing circuit may not suit a tight, bumpy one, different weather conditions or a different driving style, and driving style is often overlooked.
A known-good sheet from a similar car is a reasonable starting point. It isn’t a finished setup.
Bump Steer and Kinematics: Where Static Numbers Stop Telling the Story
Bump steer is toe change through suspension travel. It happens when the track rod doesn’t follow the same arc as the suspension arms, so the wheel steers itself as the suspension compresses and extends. Lowering a car often introduces it.

The symptoms are a car that darts over bumps, inconsistent turn-in and instability under braking. Measuring it means taking toe readings at several points through the travel, usually with the springs removed, and correcting it through the height of the rack or the outer track rod joints. This is the limit of static alignment: a car can be spot on at rest and still be wrong at the apex.
A Repeatable Measure, Adjust and Test Workflow
A repeatable process matters more than any single number, because it’s the only way to know whether a change actually helped. Before starting, make sure there’s no excessive play in any joints or components and that nothing is binding. A practical workflow looks like this:
- Prepare the car in race trim. Fit the tyres you’ll race on at your target pressures, use the same fuel load every time, and put the driver, or equivalent ballast, in the seat.
- Use a level surface. A flat patch levelled with shims, setup pads or hub stands and pit equipment removes the floor as a variable.
- Settle the suspension. Roll the car or bounce each corner after lowering it so bushes and joints aren’t bound up.
- Set ride heights from fixed chassis reference points.
- Set corner weights if the equipment on the car allows it.
- Set caster, then camber, then toe, because caster and camber changes both affect toe.
- Record the full baseline before the car leaves the workshop.
- Change one thing at a time and test it back-to-back, on the same tyres and in similar conditions wherever possible. If the result is unclear, return to baseline.
- Recheck the geometry after any off, kerb strike or component change.
What Should Go in a Setup Change Log?
A change log is what turns a series of track days into usable data. Record enough to recreate the car and the conditions:
- Event details: date, circuit, layout, weather, track and air temperature.
- Tyres: set, compound, heat cycles, cold and hot pressures, and temperatures across the tread after a run.
- Geometry: ride heights, corner weights, camber, caster and toe at each corner, with the conventions used.
- Suspension settings: damper clicks, anti-roll bar positions and spring rates.
- Load: fuel load and driver or ballast weight.
- Outcome: driver feedback by corner phase (entry, mid, exit), lap times and anything unusual.
Over a season, the log shows trends a single session never will, and it gives you a known-good setup to go back to when a change doesn’t work. For the theory behind all of this, Race Car Vehicle Dynamics by Milliken and Milliken remains the standard engineering reference.
FAQs
What Order Should Ride Height, Camber and Toe Be Set In?
Ride height first, then corner weights if the car allows it, then caster, camber and toe, in that order. Ride height changes alter camber and toe, and caster and camber changes alter toe, so toe always comes last.
Should Geometry Be Set With the Driver in the Car?
Yes, or with ballast equal to the driver’s weight in the seat. On a light race car the driver is a large share of the total weight, and leaving them out changes ride heights, corner weights and the resulting camber and toe.
How Often Should Race Car Geometry Be Checked?
Check it before each event and after any off, kerb strike, accident damage or suspension component change. Comparing the readings against your change log will also show up wear or movement in bushes and joints before it costs lap time.
Can Track Geometry Settings Be Used on the Road?
They can, but aggressive camber and toe wear tyres faster on the road and can make a car follow ruts and road camber. A fast-road setup is usually a compromise between the two. Suspension modifications should also be declared to your insurer.
Talk to Us About Your Car’s Setup
MacG Racing’s workshop at Barrow upon Trent, 10 minutes from Donington Park, offers a suspension fitting and setup service covering ride height, corner weighting, toe and camber, along with the supply and fitting of coilovers and suspension upgrades. The team has raced in endurance events up to National level, including the Silverstone 24 Hours and the British Endurance Championship. If you’d like to discuss a setup for your car, get in touch with the team.